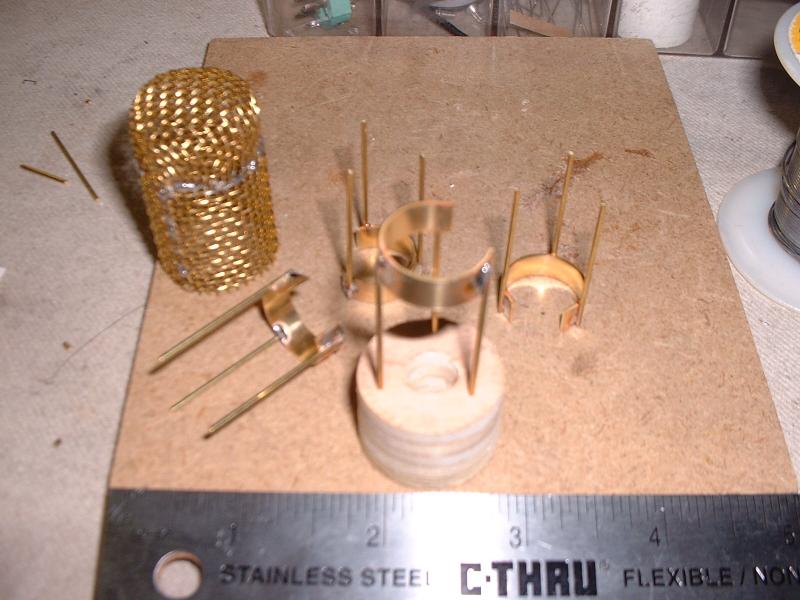
Capsule mounting clips. 1/4" wide brass strip, with 3/64" brass wire, from that little craft metal display at the hardware store. Best way to bend the strip into a clean curve is around a smaller-diameter rod or tube, since it springs back a bit after bending. I found that a socket (from an automotive tool set) worked well, since there are a lot of different outside diameters in a socket set. Plywood plug cut with adjustable circle cutter in drill press. I found that the easiest way to mount the clip into the plug was to squeeze them together in a vise, then drill the resulting holes deeper. Finally squeezed back together with vise again.
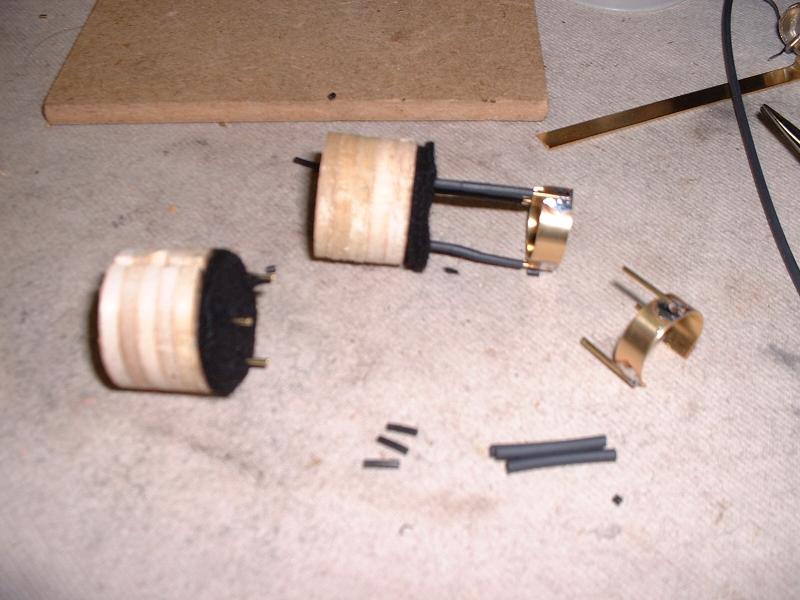
Next step is some sort of shock mounting... so I cut the clip supports in the middle, and used small heatshrink tubing to reconnect the supports. Some plastic wire insulation (stripped from the wire) as a spacer. Takes a bit of tweaking to get the distance right. Also added a couple layers of felt to absorb reflections.
I'd had this idea for using a screw to expand the wood plug inside the mic body, but couldn't get it to work. So, I used glue - a regular silicone caulk.
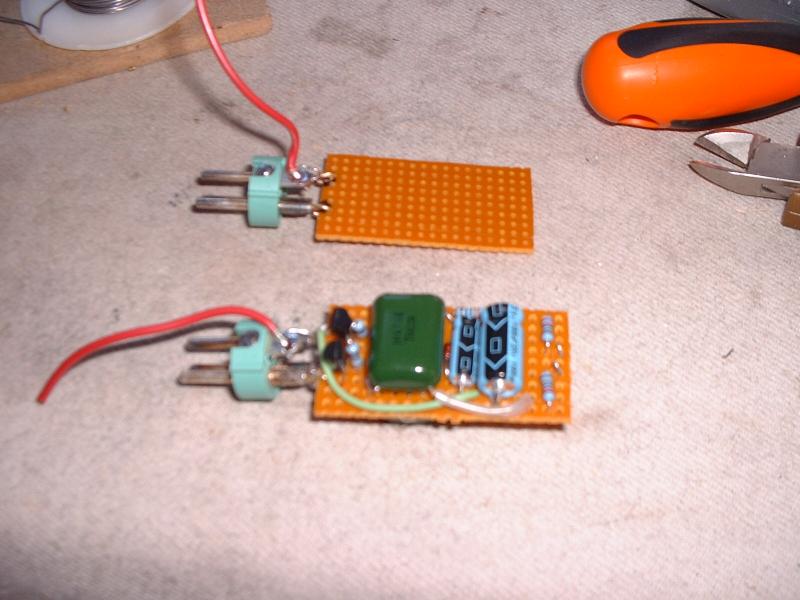
I'm still working with perfboard, since it's easy to change the circuit around as needed. I used some of the 3/64" brass wire to attach the board to the XLR pins 1 and 2. The connector is a Switchcraft B3M, with a short piece of 3/4" nonmetallic electrical conduit to make it fit nicely inside the mic body. One of the big film caps is on the back of the perfboard.